
Pamper Your Kitty
Sharing your home with your favorite feline friend is a rewarding experience. What do most people like to do for their friends? Why, something special for them, of course! Making homemade treats is a fun, personalized way to add another level of interaction between you and your cat.
Maybe your cat has certain dietary restrictions that makes finding appropriate store-bought treats a nightmare. Maybe you are a very ingredient conscious pet owner and want to know exactly what is going into your kitty. Or maybe you simply want to put forth the time and effort to show your cat just how much you care by making each treat with love.
Whatever your reason, there is a homemade cat treat recipe for you! The best part is that many recipes are extremely easy to follow. You may even have some of the ingredients already sitting in your pantry! Here are some favorites to get you started.
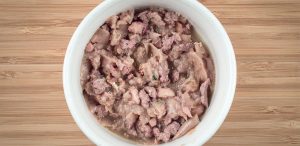
Super Simple Crisps
Ingredients:
- 1 can of wet cat food, any flavor
Directions:
- Begin preheating the oven at 350 degrees.
- Open the can of wet cat food and remove the loaf, whole (shaking the can upside down can help you accomplish this).
- Slice the loaf into ¼” thick cuts, then cut these slices into smaller, bite-sized pieces.
- Place bite-sized pieces on an ungreased cookie sheet and bake for about 30 minutes, or until crispy.
- Remove and allow to fully cool before serving.
- Excess should be kept in an airtight container and placed in your refrigerator. Discard after about 5 to 7 days.

Tasty Tuna Treats
Ingredients:
- 1 can of tuna in oil, drained
- 1 egg
- 1 ¼ cups of flour, plus some extra for dusting
- ½ cup of water
- Parsley (fresh or dried)
- Bottle cap (use this to easily cut out treats!)
Directions:
- Begin preheating oven at 350 degrees.
- In a food processor (preferably), mix tuna, egg, flour, water and parsley until it forms into a dough. If dough is too sticky, add a tad more flour.
- Dust your working surface with flour and roll out dough so that it is about ½” thick.
- Use the bottle cap to cut out treats from the dough.
- Move cut out treats to a cookie sheet, lined with parchment paper.
- Place treats in oven for 20 minutes.
- Remove and allow to fully cool before serving.
- Excess should be kept in an airtight container and placed in your refrigerator. Discard after about 5 to 7 days.

Catnip Crumbles
These are great as a tasty food topper as well!
Ingredients:
- 1 pound of ground beef
- 2 eggs
- 2 tablespoons of Catnip
Directions:
- Preheat oven to 375 degrees.
- Mix all ingredients, by hand, in a large bowl.
- Spread this mixture onto a foil-lined baking sheet.
- Bake for about 7 to 10 minutes.
- Remove and drain any excess grease (Be careful with this step, as it will be very hot!).
- Allow to fully cool and proceed to crumble into differently sized pieces.
- Excess should be kept in an airtight container and placed in your refrigerator. Discard after about 5 to 7 days.

Meaty Treats
These are a purrrrfect option for diabetic cats!
Ingredients:
- Any raw meat will do
- Food dehydrator (This is optional, as a conventional oven will also work)
Directions (Food Dehydrator):
- Cut meat into same-sized pieces, about ½” to 1”.
- If using multiple meats, keep all the same meats on the same tray. This will allow you to remove the whole tray as the meats dry while not disturbing the others that may have to dry longer.
- Dehydrate for about 6 to 8 hours.
- Once dried, these treats can be served right away! Place remaining dehydrated meats in airtight containers. Keep in the refrigerator for best results and discard after 7 to 10 days.
Directions (Conventional Oven):
- Set the oven temperature as low as it can go (preferably 140 degrees).
- Prop oven door open (DO NOT USE PLASTIC) to vent air, allowing it to circulate over the meat to dry the pieces out faster. If your oven has a circulation fan, this will also be helpful.
- Dehydrate for about 2 to 6 hours, depending on meat slice thickness and oven temperature.
- After the first 2 to 3 hours, check for doneness. If it bends easily or feels juicy, this means it needs more time!
- Once done, remove from the oven, let it cool and continue to air dry for 24 hours before packaging excess. Cooled pieces can be eaten right away!
- Store the remainder in airtight containers, in the refrigerator. Discard after 7 to 10 days.
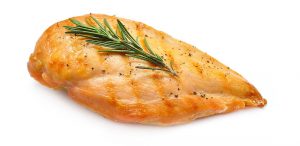
Chicken Chews
Ingredients:
- ½ cup of flour
- ½ cup of non-fat, powdered milk
- ½ cup of cooked and chopped chicken
- 1 tablespoon vegetable oil
- 1 egg, beaten
- ¼ cup of water
- 1 tablespoon Catnip (optional)
Directions:
- Preheat the oven to 350 degrees.
- Combine flour, milk and chicken in a large bowl. Proceed to mash and mix them together.
- Add water, oil, beaten egg and Catnip (if using). Stir well until a sticky dough is formed.
- Form dough into dime-sized balls and place on a greased cookie sheet.
- Flatten balls into discs, using either your finger or a utensil.
- Place in oven and bake for 10 minutes. Remove after 10 minutes and flip the discs so the other side can brown as well. Back for an additional 10 minutes, or until golden brown.
- Remove and allow to fully cool before serving. Any extra treats should be refrigerated in an airtight container. Discard after 5 to 7 days.
Remember, treats should only take up a very small percentage of your cat’s diet, as too much of a good thing often leads to tubby tabbies. Also, be aware that you should never include raisins, grapes, onions, alcohol, salt, or tea when making your own homemade cat treats. These, and a few other common foods we humans enjoy, are toxic to cats. When in doubt, if you’re not sure about a particular ingredient, it’s always best to discuss your concerns with your vet.